Sunday, September 28, 2008

Marble Painting

I'm pretty sure this isn't the most creative art project out there, but it was fun, simple, and as it is with most projects, my girls loved it. We used tempera paint, marbles, colored construction paper, and tin pans.

Here's a tip I wish I would have figured out before I cut the paper: cut the paper as big as you can, with still fitting inside the pan. Otherwise, the marble gets stuck between the paper and the sides of the pan, and you waste all of the paint on the pan instead of painting the paper!


Monday, September 22, 2008

BubbleWrap Painting

*
What we used:
finger paints
white paper
bubble wrap (small bubbles)
*
What we did:
The kids fingerpainted on the bubble wrap.
When they were happy with their piece of art, we put a piece of paper over the bubble wrap, and smoothed it out, making sure the entire piece of paper had touched the bubble wrap painting.
We picked the paper off the bubble wrap, and set aside to dry.
*


Thursday, September 18, 2008

Sand Art

I saw sand art on a few blogs the past couple weeks, so when I found the colored sand this afternoon, that's what we decided to do.

Jacob wasn't too keen on drawing a picture, then tracing it over with glue, so he just did some random glue dots and things.

Then we stuck the paper in a pan, and covered it with a bit of colored sand,

shook the sand around,

and repeated several times with different colored sand.


Fun stuff.

Friday, September 12, 2008

Rice Painting

The day prior to this project we made colored rice...

1 cup uncooked rice (not instant)
2 tsp rubbing alcohol
5 drop food coloring

Add the above to a ziploc bag; squish around to distribute color. Pour onto cookie sheet, spread out to dry.


We started the rice painting project by pouring a little bit of colored rice into small bowls (I wash & save the applesauce containers to use for projects), with one bowl having a mix of all of the colors. (the 5th bowl below is Elmer's glue)


I drew Kylie's name in bubble letters with some circles...


Kylie painted the circles and letters with the glue...


Then sprinkled rice over the glue... (we gently shook the extra off after each)


Ta-Da!

Wednesday, September 10, 2008

Mini Carmel Apples


I found some huge Granny Smith apples at the grocery store earlier this week. Monday night, we made mini carmel apples for dessert. I used a medium melon-baller to carve balls out of the apple, attached them to skewers, and let the boys dip them in the carmel.


We let them cool on the plate for a few minutes before digging in. Yum!

Monday, September 8, 2008

Chalk Fireworks

I originally did this project when I was in elementary school, but with white paper and crayons. Then when I was teaching I did it with my 3rd graders, but again with crayons, and a little more advanced (I'll talk about adapting it for older kids below). I decided for the 4th of July it would be really fun for Kylie to do with black paper and chalk, making "fireworks." I think I'll do it again during the holidays, because it's just too cute to only do once a year, and plus Stella should be old enough to make her own.

It's not even that messy (chalk dust can be... annoying), it's easy to set-up and clean-up, and most importantly, Kylie loves making chalk pictures and they always turn out really nice! (she's been doing her own pseudo pics all summer and teaching her friends; too cute!)

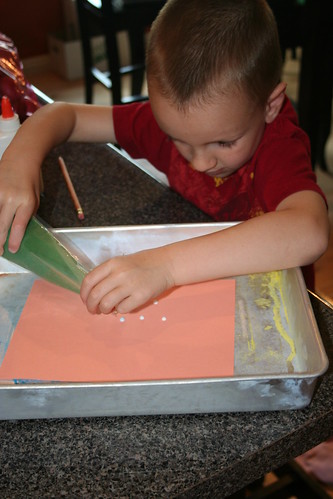
We started with a black piece of construction paper, and Kylie put dots all over the paper (these will be her "starting points" for each firework)...

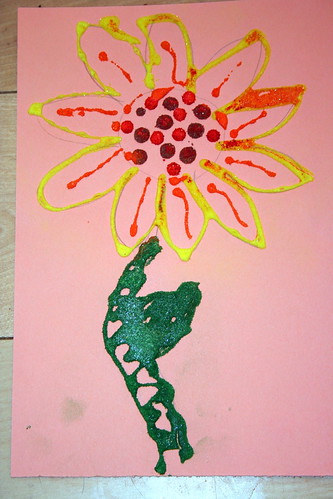
Then she used different colors and drew tons of lines coming out of each dot. The more lines and colors, the better! (she did sneak some flowers on her page, but that's fine, to each their own, I guess) We talked about making thin lines and thick lines, and even some curvy lines, to help make each firework "special."

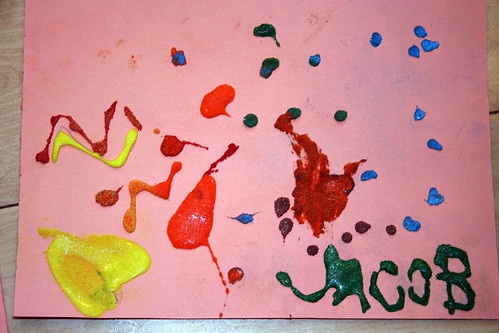
The finished product stayed on our fridge for the entire summer!


*** To adapt for older kids (Kylie was 4 when we did this), start the same way with having them put dots all over the paper. Then have them choose 3 or 4 colors to use for the project. Go around each dot with lines or tight zig-zags maybe 1/2" long. Then use the 2nd color and go around the lines you just did with the 1st color. Then use the 3rd color, and so on. Soon the "fireworks" will start to touch, and that's the fun part... you just continue to go around what you can, and soon the outer fireworks will become one. It will look amazing! If I can find an example from my teaching days, I'll post in case I'm as confusing to you as I think I might be to me!
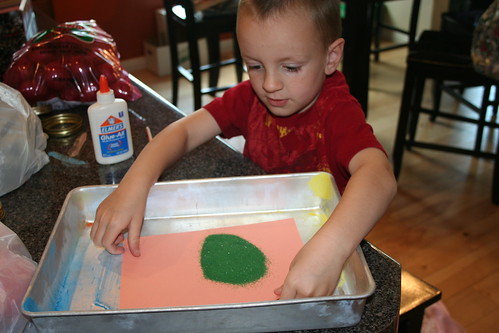
*

Saturday, September 6, 2008

70 Great Things About Having Children

Obviously, we both love our children. We love watching them learn and grow and feel joy. And we love to share those things with all of you!

I found this list of 70 great things about having children, and have to resist not coming up with a list of 70 (or more) of my own things. Laundry calls.

P.S. Remind me of this during our next tantrum!

What are you favorite things about being a parent?

Friday, September 5, 2008

rice activity

I did this rice activity with the girls, and they loved it! (little did they know it was educational) It told me a lot about where they were in their abilities. I knew Kylie was more coordinated, but I didn't realize the extent of the differences. It was interesting!

I started with pouring a bag of rice in a large bowl, and had Kylie hold the funnel over a pan while Stella scooped rice from the bowl into the funnel. Then they switched. I then had 3 different sized small bowls for them to fill-up, but like before, one had to hold the funnel, and one had to pour the rice, and then they had to agree when the bowl was full, or if it needed more. This encouraged them to work together and trust each other. I didn't let the one pouring to touch the funnel, and vice versa. We talked about how many scoops it took to fill up each bowl, and why it was less scoops when Kylie did it (her scooper was always full) than when Stella did it (her scooper was barely half-full).

After they both had a turn filling the bowls, I then had them each hold their own funnel while they filled up bowls. Kylie had no problem with this; Stella, on the other hand, spilled her rice all over creation with her first try, and opted to just fill-up the pan instead of the small bowls. I think with practice Stella will get much better with her hand-eye coordination (at least I hope so!).

Cooking with Kids: Granola Bars


This recipe from Super Healthy Kids has become a family fave, with a few small changes. The kids like stirring, Jacob has started helping to measure, and they taste really good. They're not the best for "on-the-go" granola bars, but perfect for snacking at home.

  • 2 Cup Oats
  • 1 cup brown sugar
  • 1 Cup whole wheat flour*
  • 1/2 tsp baking soda
  • 1/2 tsp baking powder
  • 1 tsp cinnamon
  • 1 tsp salt
  • 1 tsp vanilla
  • 1/2 Cup* honey, or a mixture of honey and peanut butter
  • Any dried fruit, nuts, seeds, chocolate chips, butterscotch chips, etc.
Mix all ingredients and, with greased hands, press into greased 9X11 pan. Dough will be very dry and crumbly. Bake at 325 for 20 minutes or until edges are browned. Take out and let cool entirely before cutting into granola bar-sized bars. Store in an airtight container.

*If you don't like whole wheat flour, use all-purpose. If you don't grind your own whole wheat flour, I suggest using all-purpose - I just don't like store bought whole wheat flour nearly as much as fresh-ground.
*I often use a few tablespoons more "glue" than 1/2 cup, usually in the form of peanut butter. Yum.